Sunday, July 13, 2014

Wrap It Up


You all may not know that I am currently renting a house, and of course, renting creates decorating dilemmas.  I have a small bathroom and I've been dying to give the bare walls some "punch". Here is a way (I'm attempting) to give a designer look to the walls without causing damage to them when the rental ends and the paper must come down.  (I anticipate that a sponge and some solvent cleaner (acetone) should do the trick to remove glue residue in the future) .
I am doing this look only on one wall in the bathroom, and I would suggest the same for anyone else, to keep the area of coverage somewhat small.
I found a heavy grade gift wrap at Homegoods that I found  for $4 per roll that I figured might work, heavy enough to take pulling and cutting, etc.
I would think that you could also use unpasted wallpaper to do this look too, I just didn't find any with a pattern that I liked.
 
I measured out how long the strips should be, and I used Elmer's Adhesive Spray to spray the back and put it up just like wallpaper, wiping/pushing out the bumps using a dry rag. Use an exacto blade to cut off any excess.
There are a few bubbles in the paper but I'm not going for perfection or permanency, just pop.
So far, so good....everything seems to be laying and sticking pretty well and I love the silvery gray look against the white and orange.  I used the shower and the paper seems to be holding up with the steam and moisture. I am anticipating that if any corners or edges raise up, I will reapply come of the adhesive to reattach.
 Anyway, for us apartment dwellers, this is a creative way to put up color that is not permanent.  Hope you enjoyed it! Let me know if you have other suggestions regarding rentals and putting up color...


Saturday, July 12, 2014

There is one thing about the power of paint that never ceases to amaze me...it's the ability of it to transform. Everything becomes a canvas. Even a junky old colonial pine coffee table that nobody wanted at auction.
Oh those silly folks who passed by it and couldn't see it's potential. Shame on them, but bonus for me!
So, I paid for this orphan and brought it home, and I knew exactly what to do it with it.  It's a sizeable table, measuring 60w x 29d...so I'm going for a Pottery Barn look, with a butcher block natural top.

Step 1:
Using Zip stripper, we removed the old lacquer from the top and then sanded it down to the natural pine. Make sure and wear a mask! I like Zip because it's effective and can you can start stripping within just a few minutes. Put it on thicker rather than thinner and it really works.

Step 2:
I sanded the piece all over, and removed the old hardware, getting it ready for painting. Once sanded, two coats of black paint and primer were applied, and the distressed along the edges after it dries.

Step 3. Apply two coats of wax, or polyurethane, whichever works for you...I applied wax to keep a lower sheen.

Step 4.: We got some jumbo wheels from Lowe's, which cost about $15each. I also redrilled the holes for new hardware, about $4 each... worthwhile investment for the industrial look.


What difference from BEFORE to AFTER!

I welcome your comments and questions! Subscribe to our blog!

Tuesday, July 8, 2014

The kitchen that was...then wasn't...and now finally is! PART TWO

If you are curious about the title of this blog post, I chose it because this kitchen redo almost wasn't, due to several problems I ran into. But as time went on, I was able to resolve the problems, thankfully. Not every project goes smoothly, but you learn so much from mistakes. I will discuss these later.

Onto PART TWO!
The kitchen cabinets. Just to refresh your memory, here is where we started!


I should start off by saying that there is no ONE way to paint cabinets. Every set of cabinets I have done for customers, I have done different almost every time. How you approach painting them depends on how you want them to look and function in your kitchen. For my own use, I needed a high level of durability, and wanted a glazed look rather than a distressed look for the finish.

First step we took is to remove the hardware and sand the cabinets to take the sheen down.
I chose not to take the doors off of the hinges on this project because they were pitted and old and I wanted to blend them into the cabinets rather than have them stand out.  Most of the time for customers, I do remove the hinges. But I used a Kilz primer spray to cover the hinges and get in the space between the hinges and the wood.  Above is a  pic of the cabinets primed, with brushed on Kilz (a quart) oil base primer.
Lightly sand in between the primer coat and the first coat of paint. I chose to use a semi gloss white, which can require more coats than a satin finish, but it's shinier and scrubbable. I applied two coats and sanded in between. For the glazing and antiquing I used a medium brown paint mixed 50/50 with glaze medium and applied it to the crevaces of the cabinet doors.  My goal was to keep the cabinets as bright as possible with using just enough glaze to antique it, but not make the cabinets look dirty. I kept the same hardware and just updated it with a bit of bronze Metallic spray paint and popped them back on. They look great with the bronze of the countertops!


I added a pop of color above the cabinets to play off of the fabric I selected for a valance. I love the bright colors in the material and plan on getting accessories that have those colors. And as you can see, I painted in a chalkboard above the sink area.  I love putting in surprises like that...and a chalkboard surprise behind the cabinet doors makes this kitchen fun.


So my cost of materials for this kitchen redo???

countertop paint  20.00
embossed wallpaper  20.00
polyurethane  12.00
metallic spray paint 5.00
bronze and copper glaze 10.00
spray primer 5.00
kilz primer 9.00
chalkboard paint 8.00
bronze metallic spray 5.00
 off white semi gloss 12.00
APPROXIMATELY 100.00!


MY FINAL THOUGHTS
Well, if I had to do this kitchen again, I would do a couple things differently. The Countertop paint is very toxic and takes days upon days to dry, and still seems a bit touchy after that. I would make sure next time to sand the countertops nearly into annihilation first before putting any kind of paint on them. I also wonder if using just plain Kilz oil primer on those counters would have done just as well bonding, as it does when we use it on furniture, and then you can use any color paint after that.  I will have to try it out and compare the durability of both products.
I will not rush any steps, hence creating twice the work. Because I was doing the work for myself, I rushed through a few steps and paid for it later. Paint is paint, I cant control what it will do. But I can control myself and makes sure to do each step thoroughly. It will save time in the long run.
I will double the stated drying time on anything oil based, like the countertop paint and the polyurethane. And factor in the humidity outside. That made things dry sloooooowly.
The reason I called this the kitchen that "it almost wasn't" was because I almost felt like giving up on those kitchen counters and cabinets. I ran into problem after problem. but I hung in there with it and was persistent, and kept working the problem.
So to the victor go the spoils. It is done and it is lovely.
If you plan on doing this project yourself, it is worth it I believe. When you start off with a major league ugly kitchen, you can only go up from there. Just remember to take your time, and try not to lose momentum, which is what happens when we do home projects.
Hope you enjoyed this blog! And keep following us!


Sunday, July 6, 2014

The kitchen that was...then wasn't...and now finally is! PART ONE

PART ONE: 7 DAYS WORK

Having just moved into an apartment where all rooms had been brought up to date except for the kitchen, I was delighted when my landlord told me that I could give this spacious, but ugly space an overhaul.  I mean seriously, I couldn't live with a yellow Formica kitchen with dark cabinets. It felt like a cave and swallowed up the light.


And so my game plan was this: off white cabinets with some antiquing, just like the ones I had done last month for a customer of mine. And I was doing my first trial run with a product I had never used before, Rustoleum Countertop (comes in 16 different colors). I was seriously excited!

The Countertop product is about $20, so this made me giggle with frugal glee, knowing I could get a fresh look for so low a price tag. At this point, I had no game plan for the backsplash at all. I assumed I was going to get some sort of glass tile on clearance at Home Depot. ( Now that hindsight is 20/20, I don't know that I would have gone with this countertop paint product, but I will discuss this in depth in part 2 of this blog tomorrow.)
 I started by following the instructions on the back of the can, and sanding the counters down first.  It is critical to get all of the shine off of your counters. If you do not do this, this paint will not bond with the surface! FYI...THIS PRODUCT STINKS BEYOND BELIEF! Do not try this product unless you have appropriate ventilation and a mask. You will feel like you are being given mustard gas. I'm not kidding. If you have asthma, I would not go near it. It made me feel like my lungs were closing. You also absolutely must use a roller to apply the paint to the surface...the paint may look very watery but believe me it adheres very quickly and thickly to the surface once you start rollering. With this product you will have roller marks visible in certain lighting (along with little tiny bubbles that will drive you mad)!  PLEASE be aware of that! This is not meant to be a product that creates a flawless surface!  If you are anal retentive this will make you nuts! I do believe this product is intended to be something you use to buy you a few more years with the old countertops until you get good countertops. Just my opinion (again, I will go into more detail in part 2). the instructions say to apply additional coats within 1 hour or 24 hours. I found this a little confusing...so I added an additional coat within 1 hour. This product dries incredibly fast. BUT DO NOT be deceived!! Don't even dare to put a single thing, even a finger, on this counter for a good 3 or 4 days! At least! you will rip your hair out when you go to put your coffee maker on the counter after 3 days and you discover that it is still soft and it leaves behind mini crop circles!  I did.
But then again, anything is an improvement over what was already there. 
Now, what to do about that backsplash...
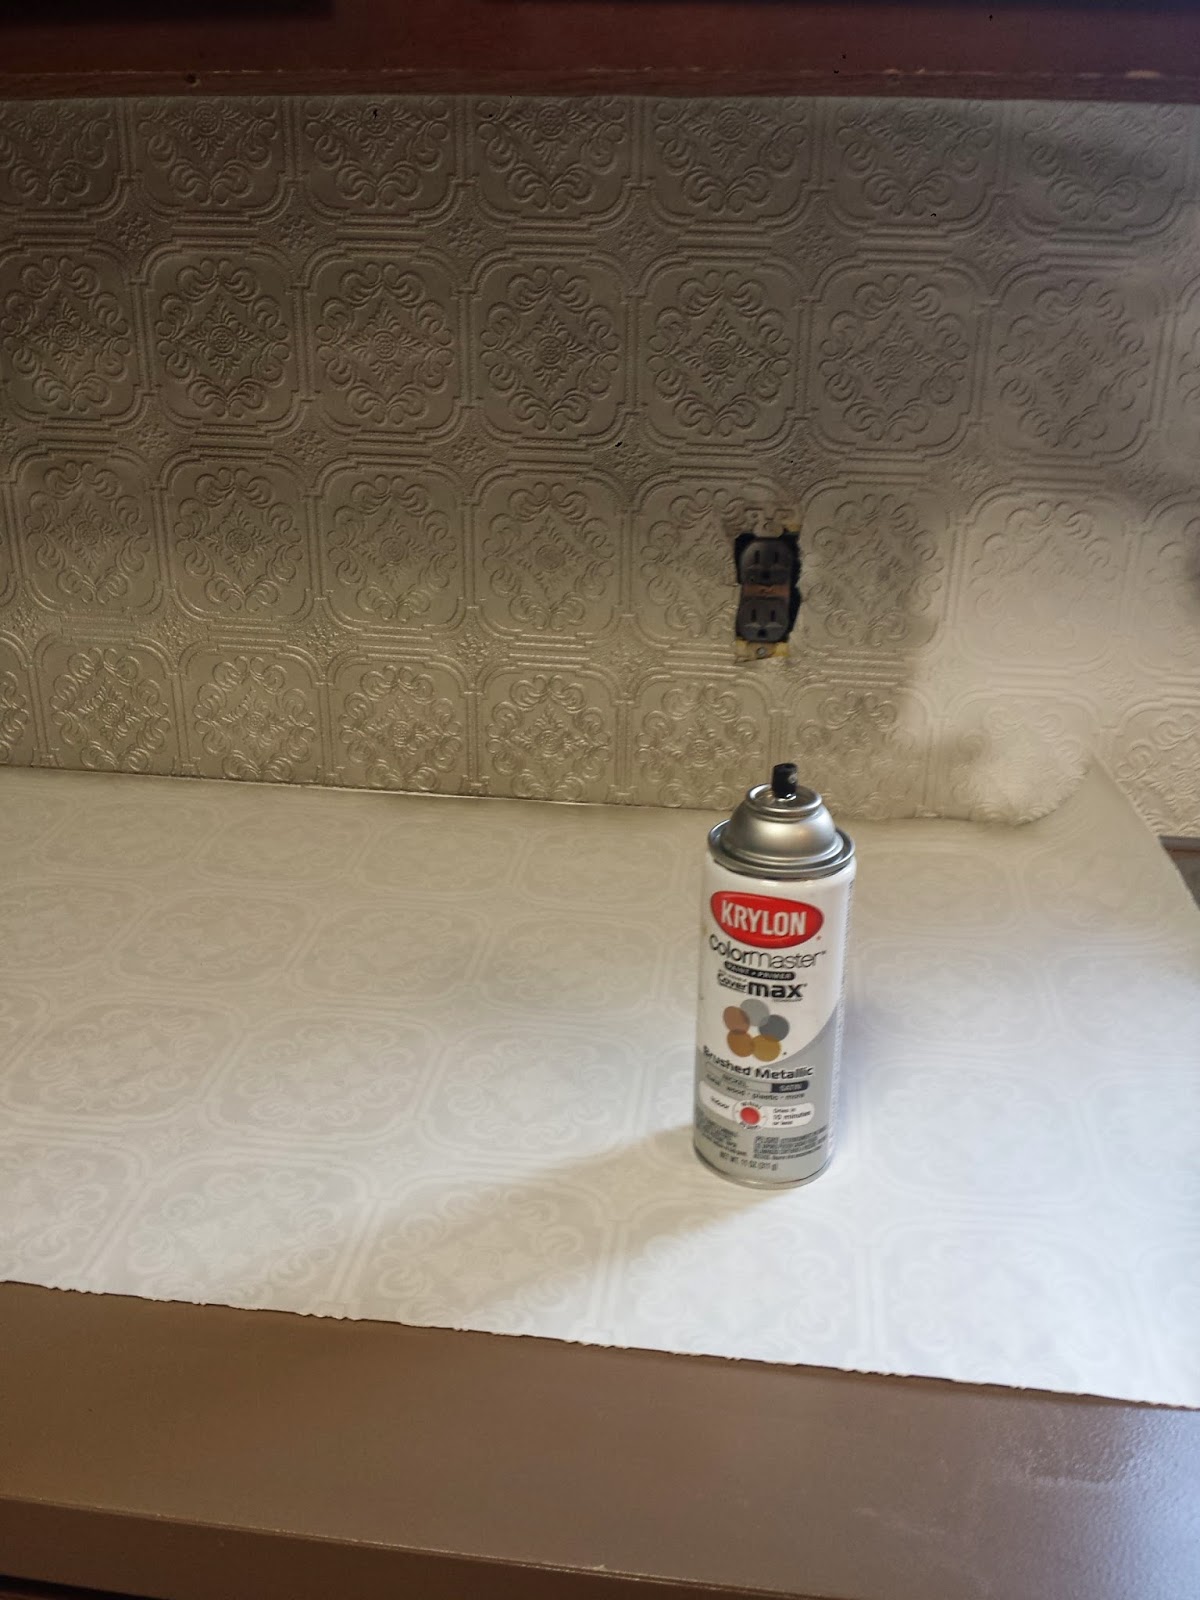
I had remembered that I had some leftover embossed wallpaper, paper that can be used to imitate tin or copper when painted. I threw a scrap piece up against that new countertop and I knew it would be perfect. It is at Lowe's for $20 per roll which covers about 25ft by 2 ft. Because a kitchen is an area exposed to a lot of heat and moisture, I decided to spackle on floor adhesive to ensure that the paper would stick on there forever.   NO, I wasn't concerned about using embossed paper for a backsplash because I have used this paper before and it is very thick and durable, especially when painted with a couple coats of enamel spray paint.  QUITE WIPEABLE as long as you don't go crazy nuts with your scowering pad on some cleaning tirade. This paper also hides a multitude of sins, especially since the backsplash had a couple of cracks in it. And it hardly shows any dirt because of the busy pattern.


I spackled, and then rolled the paper on, using the bottom metal strip as a guideline. Then used a razor blade to cut as I went along, cutting around sockets and cabinets. The floor adhesive takes about 15 minutes to really stick so it's flexible if you make mistakes. 

Once finished, it was time to spray....but only after I discovered that I had my pattern mismatched in a section and I had to take an hour to redo it. Ugh!
 I sprayed the whole thing in a nickel finish but found it was not shiny enough like tin, so my second coat was spray Chrome (very shiny silver) which, over the nickel, gave it a more true metallic semi-tarnished look.

Now that the backsplash was looking so good, I just knew something wasn't right about those countertops! They had dried for 4 days and were just too plain and showed every hand print and spec of dust and drop of water! 
So I had a light bulb moment. Paint a faux stone countertop. 
I grabbed my copper and bronze metallic paint glazes (Martha Stewart...$5ea), put some of each on each side of my sponge roller (you can use a plain sea sponge), dabbing it in random patterns, being sure not to overload the sponge with too much paint when reloading.
VOILA! Faux finish and it hides mistakes, dust and roller marks! Let this dry for at least 24hrs.
THEN get surface free of dust and apply a thick coat of semi to high gloss polyurethane with a foam roller. Make sure you get every square inch of your counter top covered with poly.  If you don't, water and heat may damage the faux you just did, either washing it away or fading it out! Let dry for 24hrs! Then apply again! and then I would wait at least a day and a half to two days, maybe more, before putting ANYTHING on the counter.  With the humidity being the way it has been, I would also suggest putting cork feet or mats under the appliances to be sure feet don't stick.  Fyi ...I'm not particularly concerned about having polyurethane as my counter surface because I use cutting boards to do all of my food prep. 
 
TO BE CONTINUED....
PART TWO TOMORROW!
How I painted my kitchen cabinets, paint choices, and how many many mistakes I made during this processs, and how I learned from it...
Night folks!!