Showing posts with label refurbish. Show all posts

Sunday, October 19, 2014

Two Stools and a Door and No Sleep

So what do I do with 2 stools and a door when I can't sleep? This...

Remove the seats...


Line up the stools where I want them placed...


Screw them in place...


Attach a board below for stabilization...glue and screw from the sides...


Paint the board to match, screw the seats back in at the bottom
and add a piece of wood under the door in the middle to act as an apron...glue and screw in place and paint to match...

Add a vintage wood piece as a back splash...glue and screw in place...drill holes in the bottom of the feet and add vintage wheels....


Shabby it up and coat with polyurethane...voila!


Sunday, August 3, 2014

The Time Has Come....finally.

Well, it seems like this is now the end of a long road. We are finally moving into our new store.  It has been a challenging and exhausting journey since May.  And like a long labor that had no epidural, this baby is finally gettin born, and it's about time. And man, did it hurt. But i'm sure the pain will someday be a distant memory (although I know for darn sure i'm never doing this again without some good drugs on hand).  Like so many things in life, some things just can't be rushed. Things take on a life of their own and you just have to ride the crest of the wave until it crashes on the shore, dumping you on the beach with sand in your suit and seashells in your hair.   Then you get up, adjust the boobs and pick out the surf wedgie, and head back to the ocean to watch for the next wave.  And the waves will eventually come.  Thank you to all my lifeguards who kept me from drowning...Rachel, Audrey, Ryan and Lori, my folks and family, and all my other support people.  I love you guys. The Shabby Attic isn't just a shop. It's a haven. It's a retreat. It's an escape,  It's a mission. Let's see where the ocean takes us next.


Saturday, July 12, 2014

There is one thing about the power of paint that never ceases to amaze me...it's the ability of it to transform. Everything becomes a canvas. Even a junky old colonial pine coffee table that nobody wanted at auction.
Oh those silly folks who passed by it and couldn't see it's potential. Shame on them, but bonus for me!
So, I paid for this orphan and brought it home, and I knew exactly what to do it with it.  It's a sizeable table, measuring 60w x 29d...so I'm going for a Pottery Barn look, with a butcher block natural top.

Step 1:
Using Zip stripper, we removed the old lacquer from the top and then sanded it down to the natural pine. Make sure and wear a mask! I like Zip because it's effective and can you can start stripping within just a few minutes. Put it on thicker rather than thinner and it really works.

Step 2:
I sanded the piece all over, and removed the old hardware, getting it ready for painting. Once sanded, two coats of black paint and primer were applied, and the distressed along the edges after it dries.

Step 3. Apply two coats of wax, or polyurethane, whichever works for you...I applied wax to keep a lower sheen.

Step 4.: We got some jumbo wheels from Lowe's, which cost about $15each. I also redrilled the holes for new hardware, about $4 each... worthwhile investment for the industrial look.


What difference from BEFORE to AFTER!

I welcome your comments and questions! Subscribe to our blog!

Sunday, July 6, 2014

The kitchen that was...then wasn't...and now finally is! PART ONE

PART ONE: 7 DAYS WORK

Having just moved into an apartment where all rooms had been brought up to date except for the kitchen, I was delighted when my landlord told me that I could give this spacious, but ugly space an overhaul.  I mean seriously, I couldn't live with a yellow Formica kitchen with dark cabinets. It felt like a cave and swallowed up the light.


And so my game plan was this: off white cabinets with some antiquing, just like the ones I had done last month for a customer of mine. And I was doing my first trial run with a product I had never used before, Rustoleum Countertop (comes in 16 different colors). I was seriously excited!

The Countertop product is about $20, so this made me giggle with frugal glee, knowing I could get a fresh look for so low a price tag. At this point, I had no game plan for the backsplash at all. I assumed I was going to get some sort of glass tile on clearance at Home Depot. ( Now that hindsight is 20/20, I don't know that I would have gone with this countertop paint product, but I will discuss this in depth in part 2 of this blog tomorrow.)
 I started by following the instructions on the back of the can, and sanding the counters down first.  It is critical to get all of the shine off of your counters. If you do not do this, this paint will not bond with the surface! FYI...THIS PRODUCT STINKS BEYOND BELIEF! Do not try this product unless you have appropriate ventilation and a mask. You will feel like you are being given mustard gas. I'm not kidding. If you have asthma, I would not go near it. It made me feel like my lungs were closing. You also absolutely must use a roller to apply the paint to the surface...the paint may look very watery but believe me it adheres very quickly and thickly to the surface once you start rollering. With this product you will have roller marks visible in certain lighting (along with little tiny bubbles that will drive you mad)!  PLEASE be aware of that! This is not meant to be a product that creates a flawless surface!  If you are anal retentive this will make you nuts! I do believe this product is intended to be something you use to buy you a few more years with the old countertops until you get good countertops. Just my opinion (again, I will go into more detail in part 2). the instructions say to apply additional coats within 1 hour or 24 hours. I found this a little confusing...so I added an additional coat within 1 hour. This product dries incredibly fast. BUT DO NOT be deceived!! Don't even dare to put a single thing, even a finger, on this counter for a good 3 or 4 days! At least! you will rip your hair out when you go to put your coffee maker on the counter after 3 days and you discover that it is still soft and it leaves behind mini crop circles!  I did.
But then again, anything is an improvement over what was already there. 
Now, what to do about that backsplash...
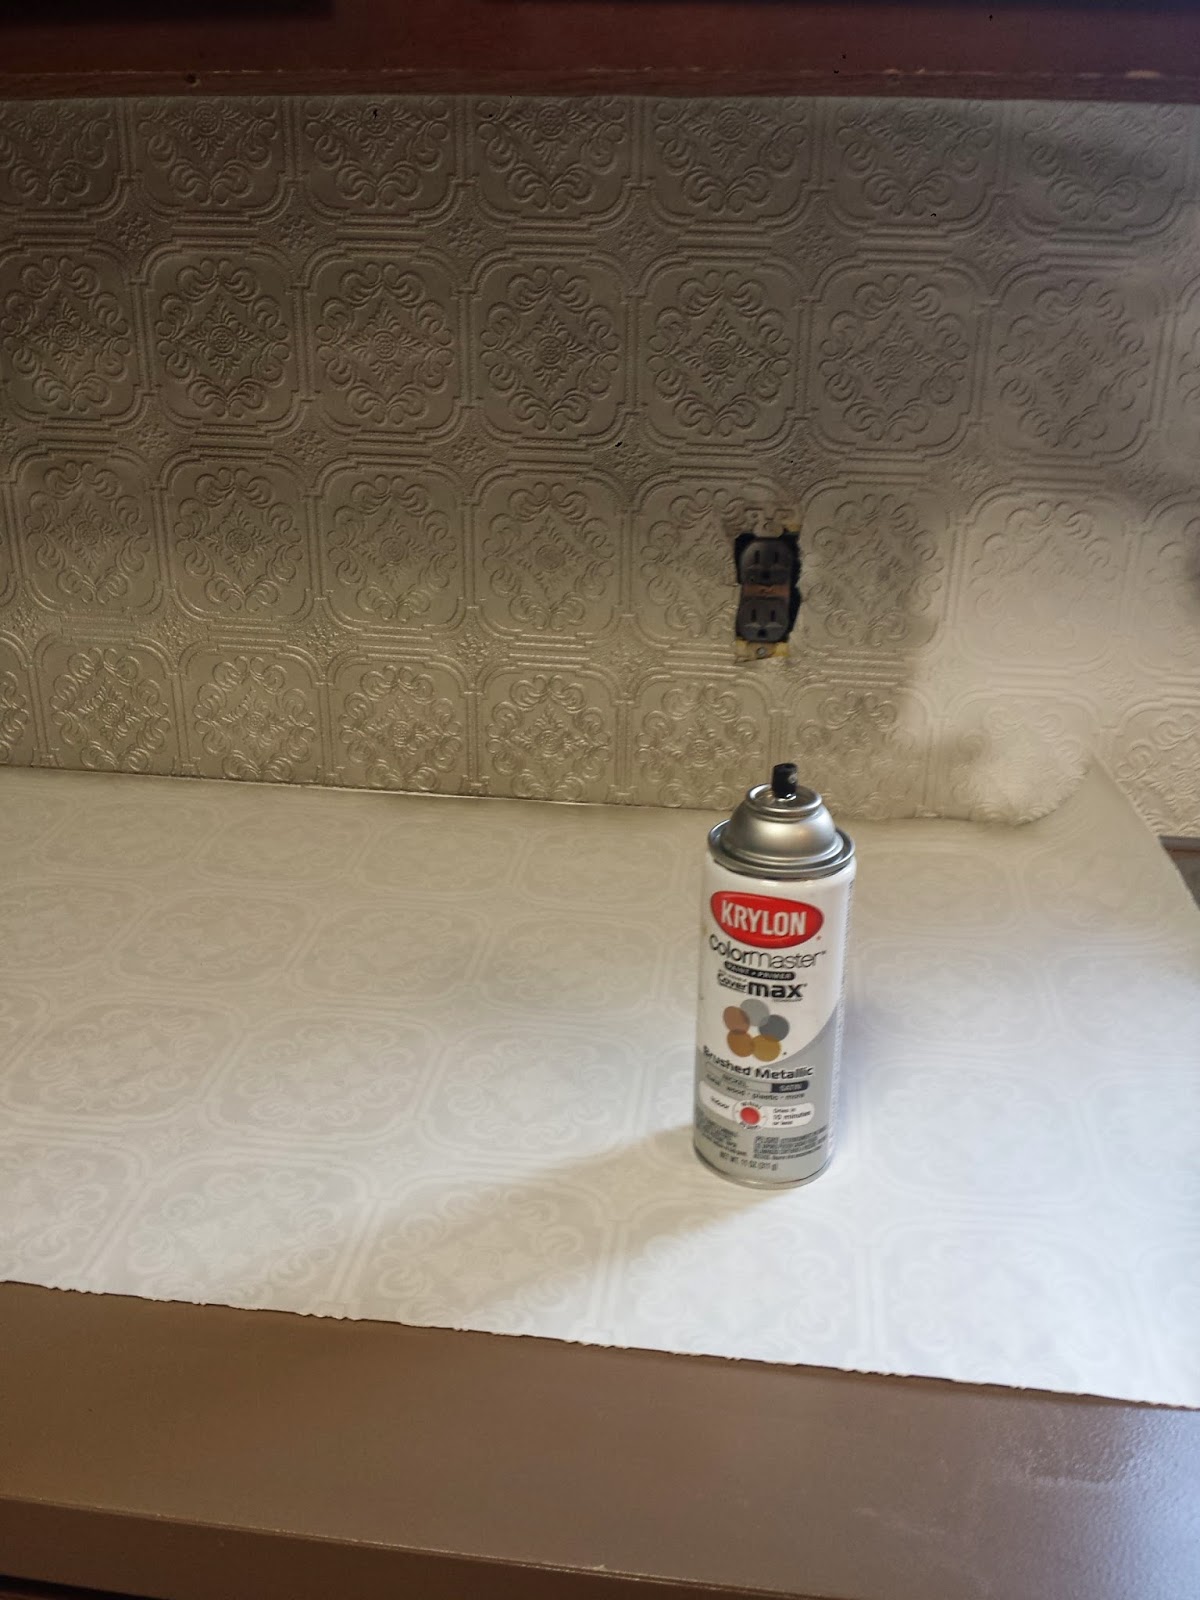
I had remembered that I had some leftover embossed wallpaper, paper that can be used to imitate tin or copper when painted. I threw a scrap piece up against that new countertop and I knew it would be perfect. It is at Lowe's for $20 per roll which covers about 25ft by 2 ft. Because a kitchen is an area exposed to a lot of heat and moisture, I decided to spackle on floor adhesive to ensure that the paper would stick on there forever.   NO, I wasn't concerned about using embossed paper for a backsplash because I have used this paper before and it is very thick and durable, especially when painted with a couple coats of enamel spray paint.  QUITE WIPEABLE as long as you don't go crazy nuts with your scowering pad on some cleaning tirade. This paper also hides a multitude of sins, especially since the backsplash had a couple of cracks in it. And it hardly shows any dirt because of the busy pattern.


I spackled, and then rolled the paper on, using the bottom metal strip as a guideline. Then used a razor blade to cut as I went along, cutting around sockets and cabinets. The floor adhesive takes about 15 minutes to really stick so it's flexible if you make mistakes. 

Once finished, it was time to spray....but only after I discovered that I had my pattern mismatched in a section and I had to take an hour to redo it. Ugh!
 I sprayed the whole thing in a nickel finish but found it was not shiny enough like tin, so my second coat was spray Chrome (very shiny silver) which, over the nickel, gave it a more true metallic semi-tarnished look.

Now that the backsplash was looking so good, I just knew something wasn't right about those countertops! They had dried for 4 days and were just too plain and showed every hand print and spec of dust and drop of water! 
So I had a light bulb moment. Paint a faux stone countertop. 
I grabbed my copper and bronze metallic paint glazes (Martha Stewart...$5ea), put some of each on each side of my sponge roller (you can use a plain sea sponge), dabbing it in random patterns, being sure not to overload the sponge with too much paint when reloading.
VOILA! Faux finish and it hides mistakes, dust and roller marks! Let this dry for at least 24hrs.
THEN get surface free of dust and apply a thick coat of semi to high gloss polyurethane with a foam roller. Make sure you get every square inch of your counter top covered with poly.  If you don't, water and heat may damage the faux you just did, either washing it away or fading it out! Let dry for 24hrs! Then apply again! and then I would wait at least a day and a half to two days, maybe more, before putting ANYTHING on the counter.  With the humidity being the way it has been, I would also suggest putting cork feet or mats under the appliances to be sure feet don't stick.  Fyi ...I'm not particularly concerned about having polyurethane as my counter surface because I use cutting boards to do all of my food prep. 
 
TO BE CONTINUED....
PART TWO TOMORROW!
How I painted my kitchen cabinets, paint choices, and how many many mistakes I made during this processs, and how I learned from it...
Night folks!!


Wednesday, May 21, 2014

everything you wanted to know about painting chairs but were afraid to ask!

After having completed a set of dining chairs this week, I thought it was good to do a blog post about painting chairs.
Here is my simple advice if you are planning to paint your own dining chairs at home:
1. painting chairs are always more work than you think!
2.  There is a reason why when I tell the girls who work for me that we are painting a set of chairs, they always let out a collective moan.
3. If you want to paint your chairs to be durable there are a lot of steps.
4. be prepared to take the week off from work.
5. find out from your insurance if they cover painting-induced carpal tunnel.
6.  pay someone to paint your chairs. You'll thank me later.

If you read the above sound advice and still want to paint your own chairs, here are steps to take to make the job a little less painful:
1. Sand the snot out of them. Get that shiny finish off...if you don't it will be chippy down the road.
2. I don't care what kind of paint you are using...chalk paint, latex, acrylic.... Spray primer the chairs first. I use Kilz oil-based primer spray.  It coats like a dream and any paint will bond to that.
3. always start painting your chair UPSIDE DOWN doing the legs first...again, you will thank me later.
4. once the legs are painted, flip it right side up. This helps with the stinkin drips, which happen a lot with chairs.
5. Sand between coats! Again, you will thank me. It saves a lot of time when you do the finishing coat.
6. You can check your chairs a hundred times over, and you will still find spots where you missed with paint. Be patient.
7. Also be patient with painting chairs with wrungs. They make you want to rip your hair out.  Trust me.
8.  for a cleaner look for your chairs (after using your primer) use spray paint rather than brush on paint.
9.  When you get done the first chair and you realize how much work they are, give us a call.  We would be glad to finish the other 5 for you ;) .

Friday, May 2, 2014

BEWARE the pitfalls. And paint buckets.

It has been yet another week of soul searching about my growing business. How can I possibly keep up, what's my next move, why does my store always look crazy (two quarts of paint got tripped over and spilled this week) why isn't my Facebook page more interesting, why do other pages seem to have their crap together and not me????
I had talked today to my stepdaughter about having feelings of jealousy that other business minded people seem to be progressing forward with their businesses in terms of the WOW factor, while I still feel stuck in the stone age. I do not Instagram. I barely Twitter. My website is out of date. I let my Etsy shop shrink. I write hand written receipts and I have a glorified ledger. I am currently not writing a book. I have no scheduled speaking engagements.  But what I concluded at the end of the day is this: I should not look to the right or to the left but focus solely on my own tasks at hand. BEWARE THE PITFALLS of comparing yourself to what other people do!! While it's good to keep an eye on what is trendy, what sells, what new colors are popular, etc, it is dangerous to one's own creativity and growth to look too long over what other's are doing. It's easy to follow trends. But new heights of creativity can only come from doing your own thing. Pinterest is a great example of this "looking" I speak of. While it is great for the occasional look-see, I avoid it for the most part. Because everybody's pin boards start to look alike, and I don't want my stuff to look like everybody else's. I want us to be unique! To do things that nobody has done on the internet. Maybe that makes me not as popular, but at least I know what we create is one-of-a-kind. Just like any flower in the garden, God grows us each in our own unique way, in our own timing, with our own custom-fit goals and achievements. So I will continue to focus on our humble little shop. And see what blossoms out of it.