PART ONE: 7 DAYS WORK
Having just moved into an apartment where all rooms had been brought up to date except for the kitchen, I was delighted when my landlord told me that I could give this spacious, but ugly space an overhaul. I mean seriously, I couldn't live with a yellow Formica kitchen with dark cabinets. It felt like a cave and swallowed up the light.
And so my game plan was this: off white cabinets with some antiquing, just like the ones I had done last month for a customer of mine. And I was doing my first trial run with a product I had never used before, Rustoleum Countertop (comes in 16 different colors). I was seriously excited!
The Countertop product is about $20, so this made me giggle with frugal glee, knowing I could get a fresh look for so low a price tag. At this point, I had no game plan for the backsplash at all. I assumed I was going to get some sort of glass tile on clearance at Home Depot. ( Now that hindsight is 20/20, I don't know that I would have gone with this countertop paint product, but I will discuss this in depth in part 2 of this blog tomorrow.)
I started by following the instructions on the back of the can, and sanding the counters down first. It is critical to get all of the shine off of your counters. If you do not do this, this paint will not bond with the surface! FYI...THIS PRODUCT STINKS BEYOND BELIEF! Do not try this product unless you have appropriate ventilation and a mask. You will feel like you are being given mustard gas. I'm not kidding. If you have asthma, I would not go near it. It made me feel like my lungs were closing. You also absolutely must use a roller to apply the paint to the surface...the paint may look very watery but believe me it adheres very quickly and thickly to the surface once you start rollering. With this product you will have roller marks visible in certain lighting (along with little tiny bubbles that will drive you mad)! PLEASE be aware of that! This is not meant to be a product that creates a flawless surface! If you are anal retentive this will make you nuts! I do believe this product is intended to be something you use to buy you a few more years with the old countertops until you get good countertops. Just my opinion (again, I will go into more detail in part 2). the instructions say to apply additional coats within 1 hour or 24 hours. I found this a little confusing...so I added an additional coat within 1 hour. This product dries incredibly fast. BUT DO NOT be deceived!! Don't even dare to put a single thing, even a finger, on this counter for a good 3 or 4 days! At least! you will rip your hair out when you go to put your coffee maker on the counter after 3 days and you discover that it is still soft and it leaves behind mini crop circles! I did.

But then again, anything is an improvement over what was already there.
Now, what to do about that backsplash...
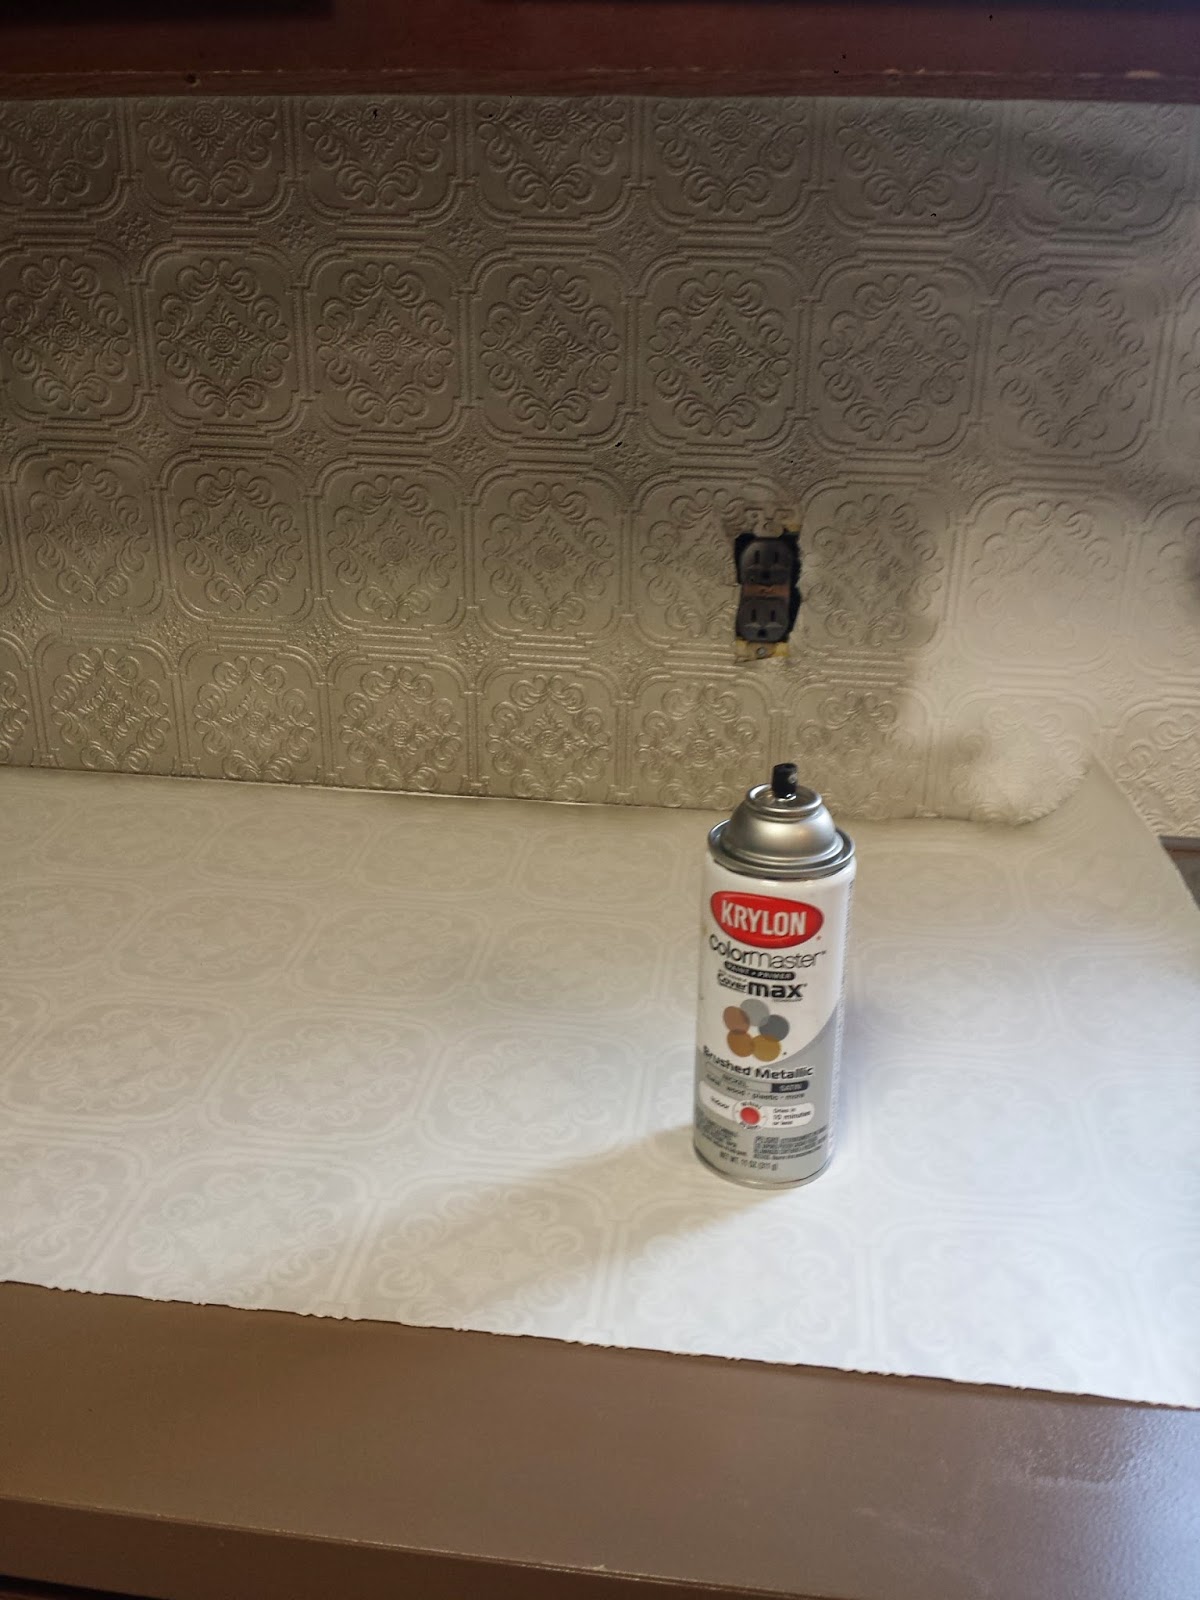
I had remembered that I had some leftover embossed wallpaper, paper that can be used to imitate tin or copper when painted. I threw a scrap piece up against that new countertop and I knew it would be perfect. It is at Lowe's for $20 per roll which covers about 25ft by 2 ft. Because a kitchen is an area exposed to a lot of heat and moisture, I decided to spackle on floor adhesive to ensure that the paper would stick on there forever. NO, I wasn't concerned about using embossed paper for a backsplash because I have used this paper before and it is very thick and durable, especially when painted with a couple coats of enamel spray paint. QUITE WIPEABLE as long as you don't go crazy nuts with your scowering pad on some cleaning tirade. This paper also hides a multitude of sins, especially since the backsplash had a couple of cracks in it. And it hardly shows any dirt because of the busy pattern.


I spackled, and then rolled the paper on, using the bottom metal strip as a guideline. Then used a razor blade to cut as I went along, cutting around sockets and cabinets. The floor adhesive takes about 15 minutes to really stick so it's flexible if you make mistakes.
Once finished, it was time to spray....but only after I discovered that I had my pattern mismatched in a section and I had to take an hour to redo it. Ugh!
I sprayed the whole thing in a nickel finish but found it was not shiny enough like tin, so my second coat was spray Chrome (very shiny silver) which, over the nickel, gave it a more true metallic semi-tarnished look.
Now that the backsplash was looking so good, I just knew something wasn't right about those countertops! They had dried for 4 days and were just too plain and showed every hand print and spec of dust and drop of water!
So I had a light bulb moment. Paint a faux stone countertop.
I grabbed my copper and bronze metallic paint glazes (Martha Stewart...$5ea), put some of each on each side of my sponge roller (you can use a plain sea sponge), dabbing it in random patterns, being sure not to overload the sponge with too much paint when reloading.
VOILA! Faux finish and it hides mistakes, dust and roller marks! Let this dry for at least 24hrs.
THEN get surface free of dust and apply a thick coat of semi to high gloss polyurethane with a foam roller. Make sure you get every square inch of your counter top covered with poly. If you don't, water and heat may damage the faux you just did, either washing it away or fading it out! Let dry for 24hrs! Then apply again! and then I would wait at least a day and a half to two days, maybe more, before putting ANYTHING on the counter. With the humidity being the way it has been, I would also suggest putting cork feet or mats under the appliances to be sure feet don't stick. Fyi ...I'm not particularly concerned about having polyurethane as my counter surface because I use cutting boards to do all of my food prep.
TO BE CONTINUED....
PART TWO TOMORROW!
How I painted my kitchen cabinets, paint choices, and how many many mistakes I made during this processs, and how I learned from it...
Night folks!!